You have bought the Yoast SEO Premium version and not sure how to set it up correct? Well, it’s basically nothing different from the free version. After doing a lot of research on the plugins features and Google’s standards, I have come up with the perfect settings to where you don’t have to worry about this plugin ever again. Well if they do a major update and new features are added then this blog post will have to be updated once I research those new features that have been added.
Once you have the plugin installed then you can use the tutorial below to set up this plugin correctly the first time around. Took me months of tinkering with these settings till I understand why I had to do a certain thing in each box for best SEO success rate in the long run.
WARNING: By following this tutorial below, you may loose some of your rankings depending on how many changes that you had to make, the rankings will come back stronger in a few short week’s. Speed up the reindexing process by publishing fresh content a few days a week.
If you are not that familiar with SEO and do not want to hire someone who could be a fake SEO expert, you can now learn all about SEO and be in control of your blogs success. A new DIY SEO Course is available from a reputable SEO expert. This course has WPOutcast’s stamp of approval.
Let’s get started:
Dashboard
Navigate to your dashboard which you should end up with the following page showing no errors to correct. If you do, fix those then come back to finish this tutorial. I would suggest emailing their support team for help with that issue. I may be of help still if you ask me for it.

Next Tab (General)

The General Tab is just for viewing purpose and no changes needed obviously. However, if you totally messed up your plugin settings and want to go back to the default settings as if you just installed the plugin for the first time, you can do this by clicking a button in the general tab. I would advise to not do this as you will certainly loose all rankings for a while.
Next Tab (Features)
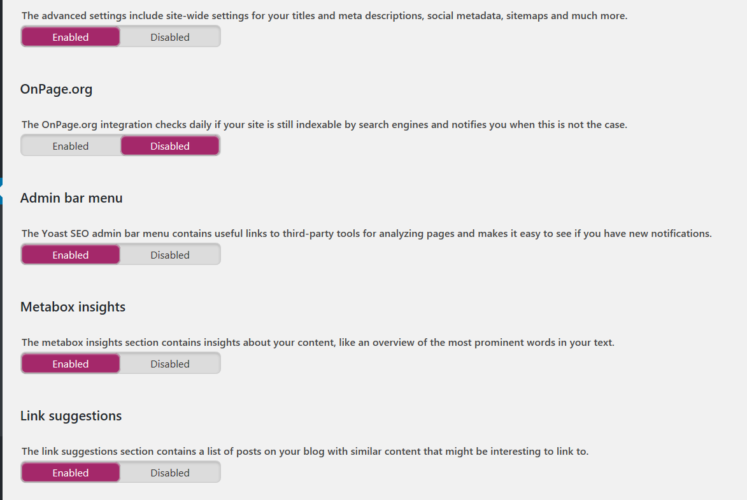
The features tab may need some changes on your part. These settings are very important and all of them should be enabled like so. The Yoast admin bar, you could do without enabling but I actually use it myself so I left it enabled. Here is what it looks like.
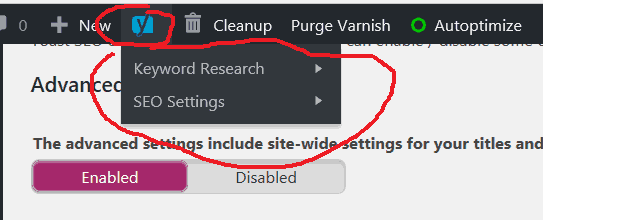
Look at the features made available in the bar. This is why I left it enabled.

The SEO Book leads to a book and the SEO settings link is just a link to the settings page that we are going through right now.
Moving to the next tab

Your Info tab. This tab is crucial you are confident with what you fill in the box. If your blog is actually your company blog then don’t select “person” as this blog is not a company blog.
Moving to the next Tab

The Webmaster Tools tab. This is where you have to login to certain sites and verify your blog and put the verification codes in the box below. If you need help with this, click on the help link on this page for instructions.
Moving to the next tab

The Security tab. Choose if you want to enable or disable this feature. The choice is yours on this one. Make sure you saved all changes so this one section is all done and we can dive deeper into more settings. I have enabled the feature in there. Here is what is shows for all member groups on your blog that can create blog posts.
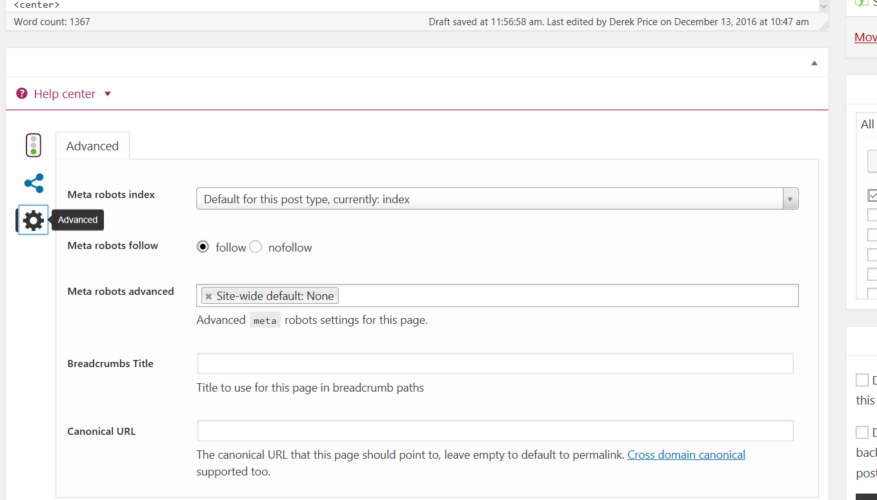
Save changes and to the next section
Titles & Metas
This is where the meat of the plugin is. Once you change these settings, do not change them again or Google would have to recrawl all posts and pages to see the changes you made. This brings us back to the comment I made about loosing some rankings for a few weeks or maybe less as all content has to be recrawled by the search engine bots.
- Recommended SEO Tool: Get 1 Month Free Trial – Local Search Rank Checker Tool
The General tab. You could choose any setting you like but here is what I came up with.
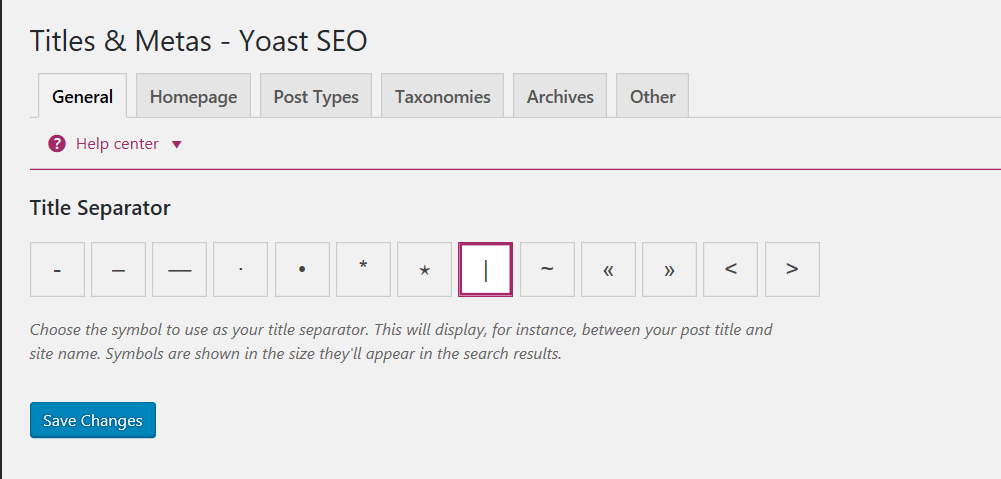
Makes no difference the separator that you use but feel free to copy off WPOutcast choice.
Moving to the next tab
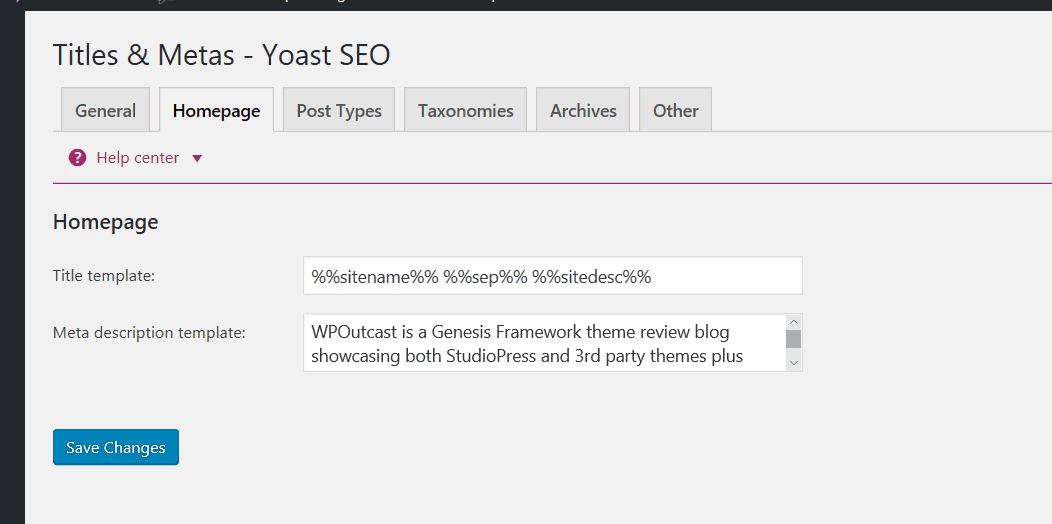
Move along to the Homepage tab and this is where you write the title – short slogan and your blogs description. All of this is what you would see in the search engine when you look up your domain using this markup: site.wpoutcast.com
I could manually write the title and tag line but instead I use the Yoast way which works. How did I get those words for the blogs title? Just click on the help button on this settings page and use a variable.
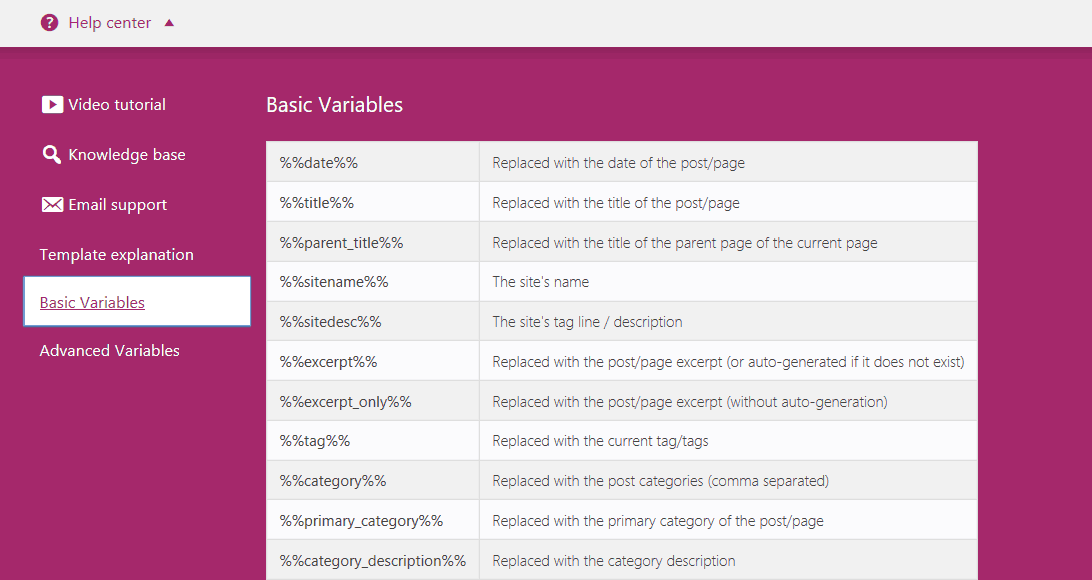
Moving to the next tab
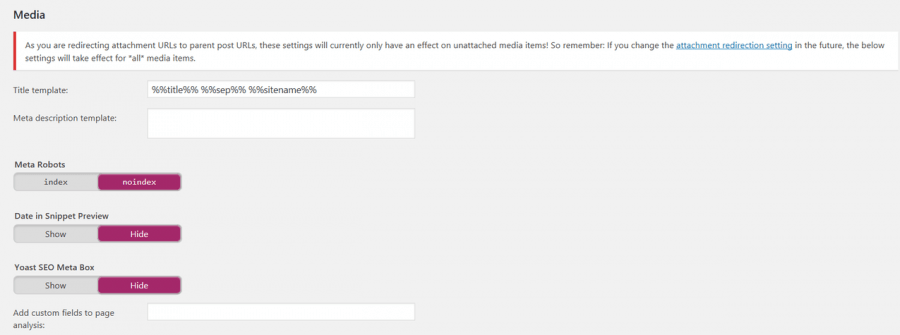
The Post Type tab. Here is what you should add in the following images: (refer to the variables pages for meanings)
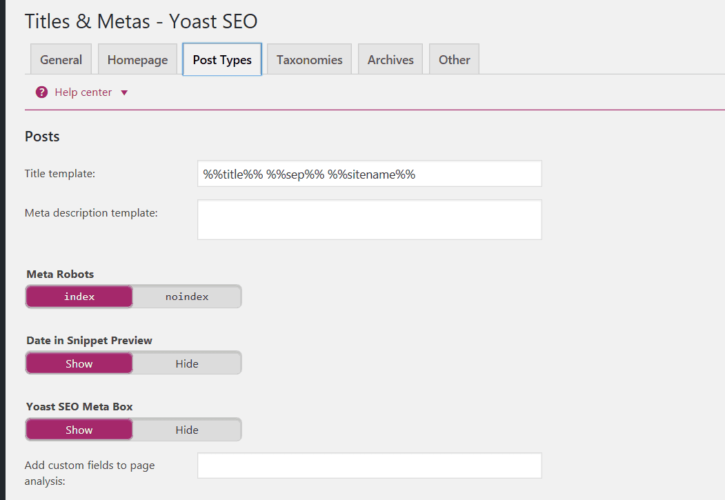

Don’t pay attention to the warning in this one, no negative effect on SEO if you should get one.
- Suggested Tutorial: How To Set Up The a3 Lazy Load Plugin
Time to move to the next tab which is Taxonomies. We choose not to index the categories in the search engine for our own reasons. I’d rather have the blog posts ranked then the category. I don’t index tags as I believe that is a cause of duplicate content. Yet I still use them on blog posts.
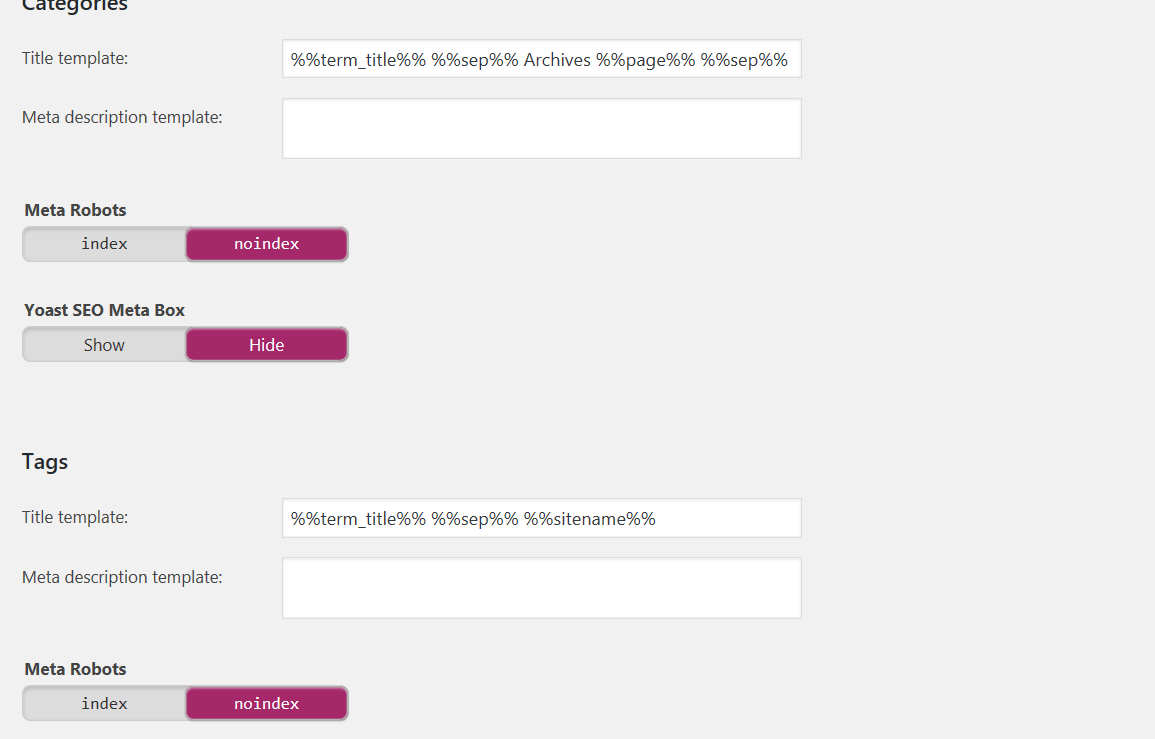
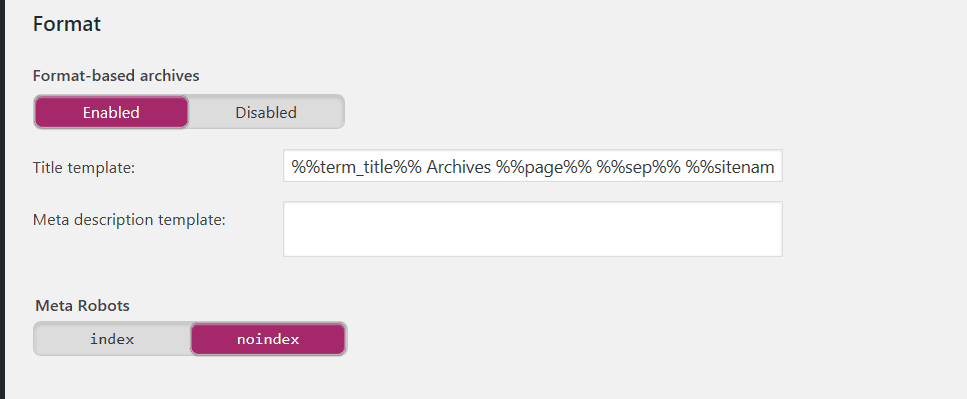
Archives – tab settings:

Read the content in the image above and choose your own settings, settings will be different for each blog admin. Although you can copy off my settings. When I approve any guest blog posts, I will enable the author archives.
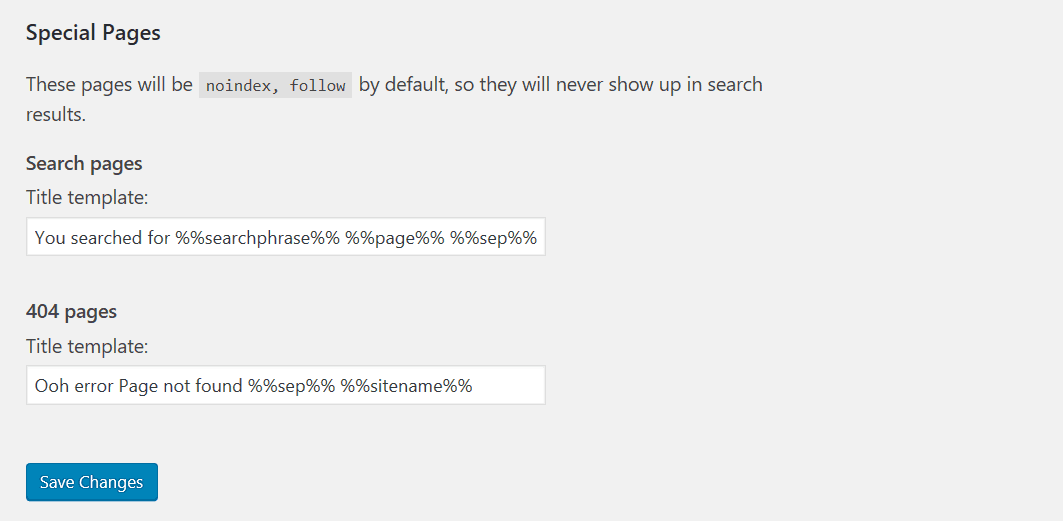
Last tab which is the Other tab.
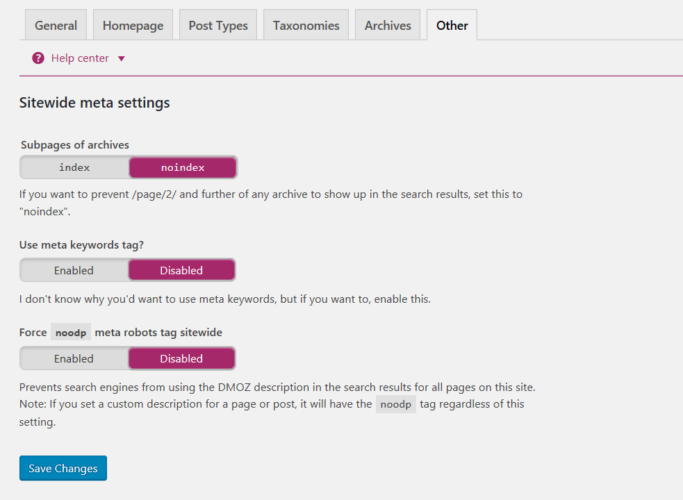
Make sure you saved all changes. We are done with this whole section.
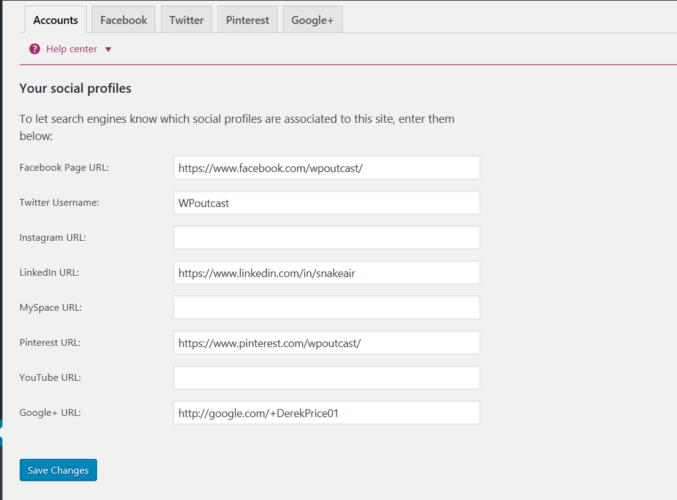
Social Tab
This is something I need not to explain, read the content on the page and in the tabs that you still have to do stuff in. Save all changes. Here is an example of one tab completed. The help documents for this section are clear as day. This section needs to be done so Facebook open graph is enabled when you share content…etc
XML Sitemap
Note after you make all changes in this tab, you need to delete your old sitemap in Google Search Console and add the one Yoast will create. I’ll give you the right URL to use in your Search Console at the end.
Mimic, the image below or verify it looks like the image below.
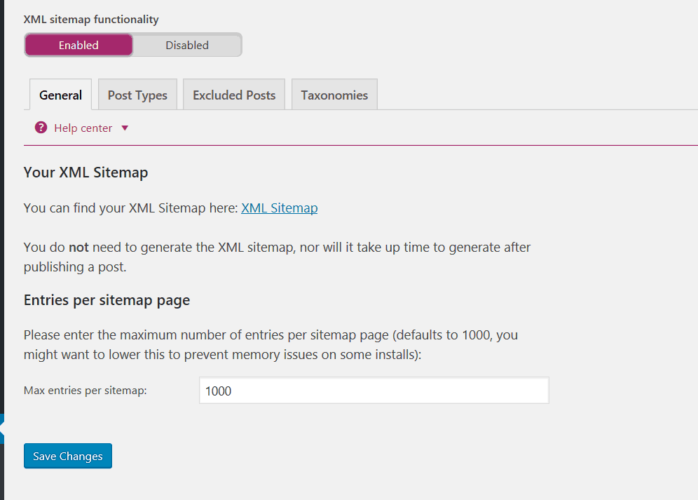
There is a link to click on to generate your sitemap to add into Google Webmaster tools. For example, here is ours: https://www.wpoutcast.com/sitemap_index.xml/
The rest of the settings you can enable or disable as personal preference in what you want indexed into the search engines. Just a few suggestions from myself, post and pages enabled and category disabled. Everything else I have excluded from the sitemap including my privacy policy, Disclaimer and contact page from being indexed by Google.
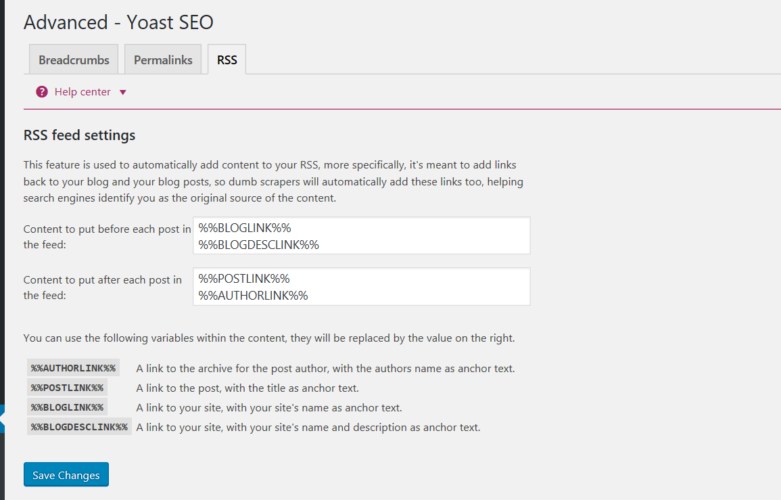
Advanced Tab
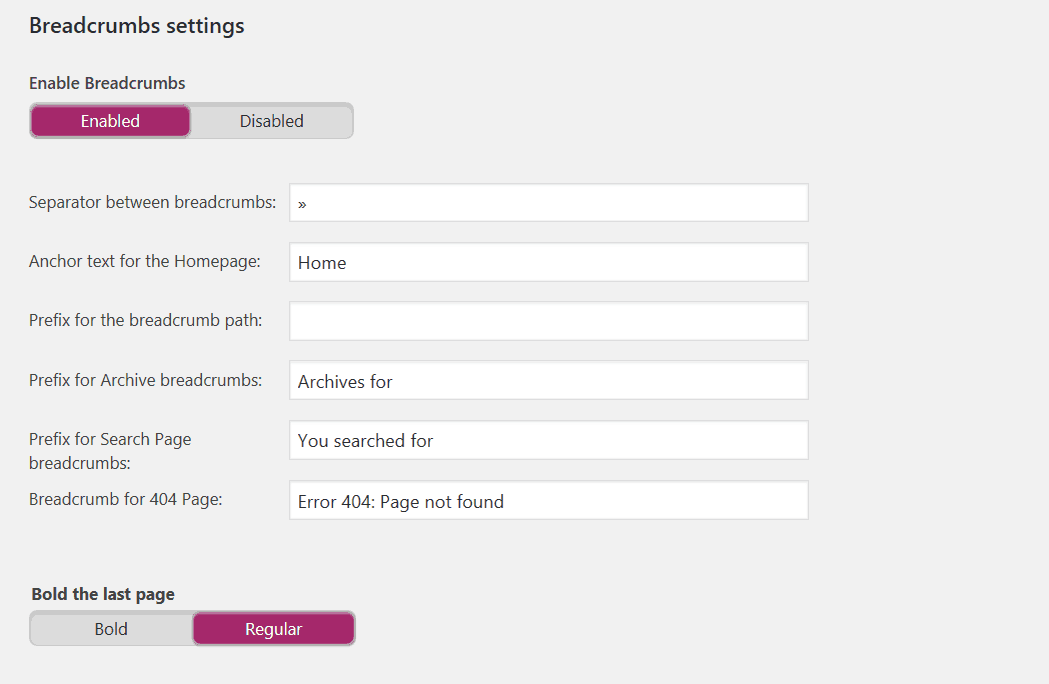
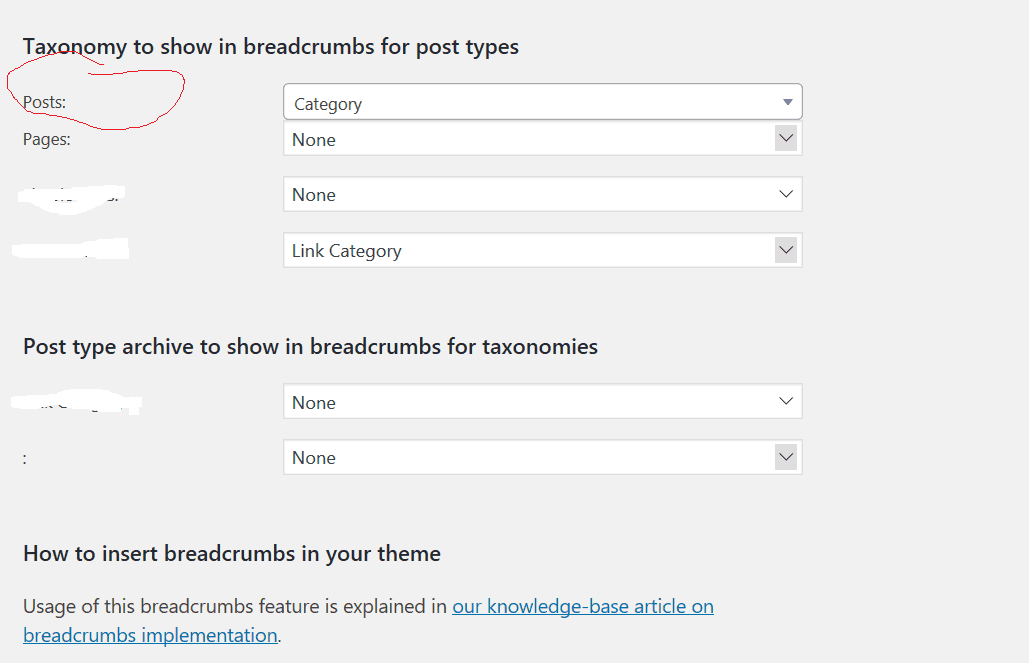
You can enable the breadcrumb feature but if after doing this, the breadcrumb feature does not show up on your theme, you need to contact the theme creator to see why it’s not showing up and mention this SEO plugin you are using. Here the default settings I have enabled.
- Suggested Tutorial: 5 Simple Codes To Customize Your Theme After Installation
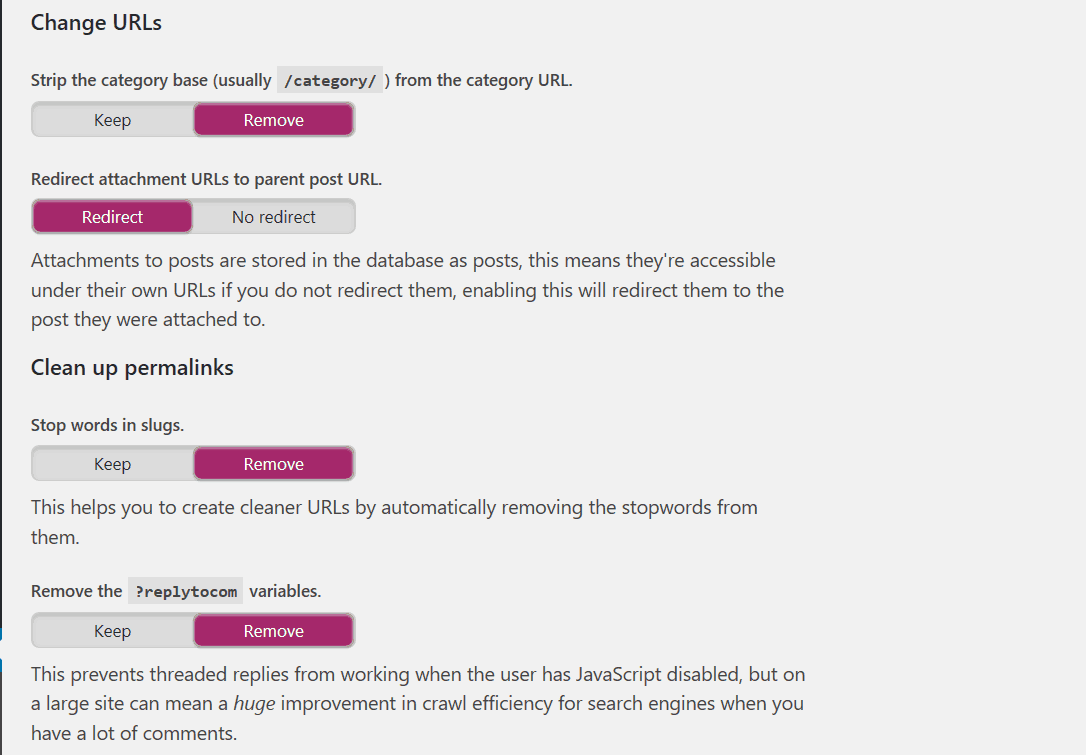
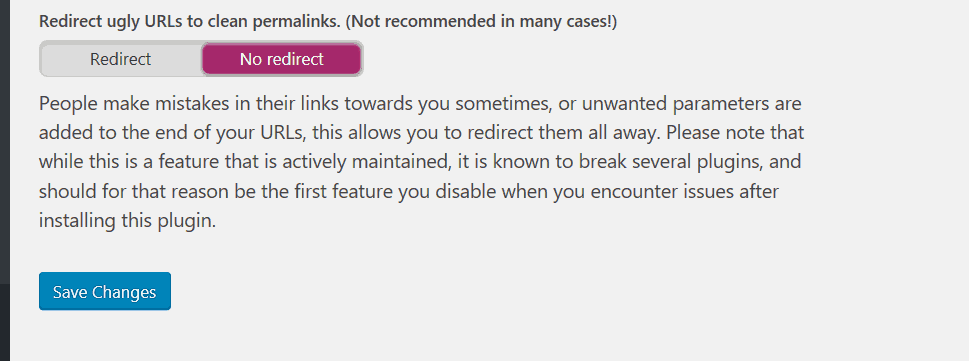
Let’s go to the permalinks tab which is very important page.
Here are the settings:
Tools
The most important thing to do in this section is create your robots.txt file. You can use the same settings as me but if there are more folders you want blocked or certain bots, please do this on your own.
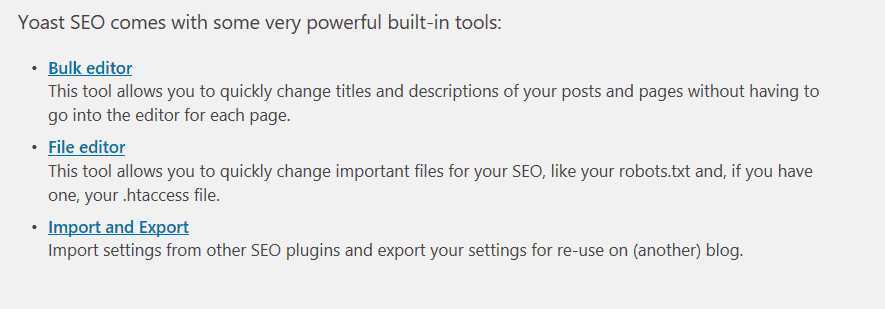
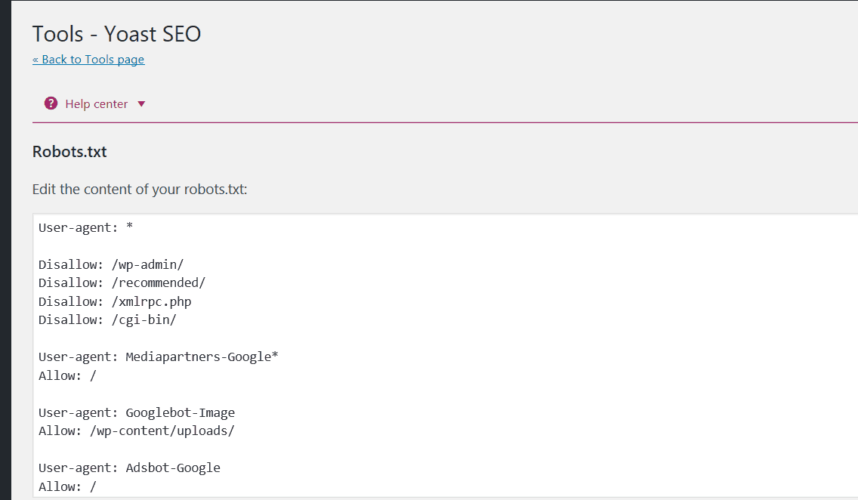
What you do with all the other settings is your own business as I don’t have any recommended settings to share with you. Robots.txt file is most important.
You have reached the end of this tutorial. My advice now is for you to first ping your blog. Search Google for “pingomatic” which is free and re-submit your sitemap in Google Search Console. Next thing to do is just produce fresh content on your blog so the search bots slowly start to recrawl your whole blog and slowly start to adjust your indexed links to adhere to the new settings you just made.
If this blog post was helpful to you in any way, please consider sharing it online with your followers.

wonderful informative about Yoast Premium SEO Plugin. very helpful for me
Hello Sir
Thankyou sir for sharing this type magical information.(How To Set Up The Yoast Premium SEO Plugin) this information is a very helpful for me for set up my yoast seo plugin. please be continue bloging.